
The financial appeal of buying a high-mileage or heavily used vehicle is undeniable, especially in today’s economic climate where the cost of new vehicles continues to soar. For many, finding a heavily depreciated gem feels like a victory, offering a way to avoid crippling monthly payments and high insurance premiums. However, the used car market is a landscape fraught with hidden repair nightmares that can quickly turn a budget-friendly purchase into a relentless financial drain.
In the past, simply “kicking the tires,” checking the oil, and taking a quick spin around the block might have been enough to assess a vehicle’s health. Today, modern cars are incredibly complex machines governed by interconnected computer networks, intricate geometries, and advanced materials. A failure or neglect in one system can rapidly cause a domino effect, destroying adjacent components and compromising the safety of the vehicle.
To protect your wallet and your safety, you need more than just a superficial glance. A comprehensive, step-by-step inspection framework is absolutely vital. By knowing exactly where to look, what to touch, and how to interpret the feedback the car gives you, you empower yourself as a buyer. You gain the ability to spot critical red flags, accurately estimate future maintenance costs, negotiate a much fairer purchase price, or—most importantly—confidently walk away from a deal that is destined to become a money pit.
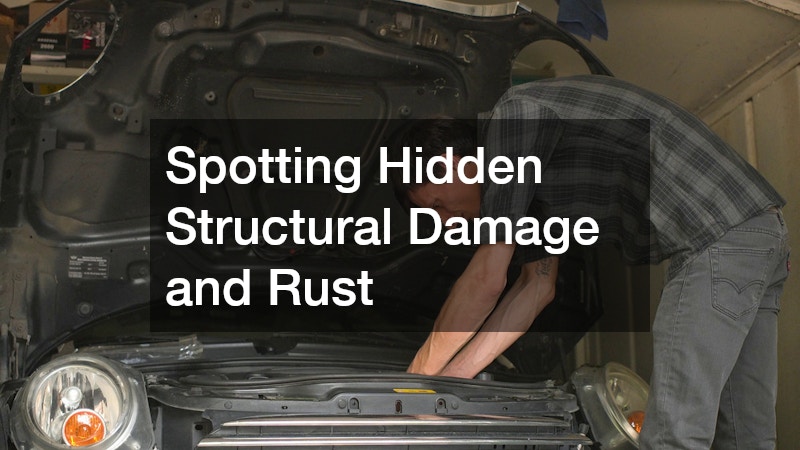
Spotting Hidden Structural Damage and Rust
When evaluating the exterior shell of a heavily used vehicle, you are looking for more than just obvious dents, dings, or scratches. You are playing the role of a forensic investigator, trying to uncover whether the car has suffered severe trauma in its past that the current owner or a quick-flip dealership is trying to hide. A shiny exterior can easily mask compromised structural integrity, which is a massive safety hazard in the event of a future collision.
-
Run a Magnet Over Suspect Panels: A fantastic, low-tech way to check for hidden damage is to wrap a weak refrigerator magnet in a thin microfiber cloth (to prevent scratching) and gently slide it along the car’s body panels, particularly around the wheel arches, the lower door sills, and the corners of the bumpers. Factory body panels are typically made of steel. If the vehicle has been in a severe accident, the damaged areas may have been hammered out and heavily filled with plastic body filler, commonly known as Bondo, during a subpar auto body repair before being painted over. Because the magnet will not stick to plastic filler, a sudden drop in magnetic pull tells you exactly where the hidden damage lies and how extensive it is. Note that some modern high-end cars use aluminum or fiberglass panels, so be sure to test the magnet on the roof first to establish a baseline.
-
Check for Overspray and Mismatched Clear Coats: Look closely at the rubber weather stripping around the windows, the inner wheel wells, the exhaust pipe, and the edges of the headlights. Do you see tiny specks of paint that match the car’s exterior color? That is overspray. It indicates that the car was taped off and repainted hastily, rather than having the trim properly removed. Furthermore, look down the side of the car under direct sunlight. If the front fender has a slightly different shade of gloss, or the texture of the paint looks like an orange peel compared to the smooth door next to it, the car has likely received a cheap, rushed auto paint service meant to quickly cover up damage just long enough to secure a sale.

Scrutinizing the Cabin’s Shield and Visibility
The glass on a vehicle is rarely given much thought until a problem arises, but it serves a critical function beyond just keeping the wind out of your face. Modern automotive glass is an integral part of the vehicle’s structural safety cage. In the event of a rollover, the front glass provides a significant amount of the roof’s crush resistance. Furthermore, the passenger-side airbag relies on the structural integrity of the front pane to deploy correctly; if the glass is compromised, the airbag can blow right through it instead of protecting the occupant.
-
Measure the Spread of Star-Breaks and Chips: Take a very close look at the front and rear glass for small rock chips, often referred to as bullseyes or star-breaks. A good rule of thumb is the “quarter rule.” If the entire chip, including the tiny spiderweb cracks radiating from the center, can be completely covered by a US quarter, it can usually be salvaged. High-quality auto glass repairs involve injecting a clear, curable resin into the void, which restores the strength of the pane and prevents the crack from spreading due to temperature fluctuations or road vibrations. If you spot these small chips, you can use them as a negotiating tool to lower the price.
-
Inspect the Edge Seals for Deep Cracks: The edges of the glass are where the most stress is concentrated. Trace the perimeter of the front glass with your eyes. If you find a crack that originates from beneath the rubber molding or reaches the outer edge of the glass, the structural integrity of the entire pane is compromised. These types of edge cracks cannot be safely filled with resin. Because the safety of the cabin is now severely diminished, this discovery mandates a costly, full car windshield replacement, which must be factored into your purchasing budget immediately.

Diagnosing the Ride Dynamics on Your Test Drive
A test drive should never be just a casual cruise with the radio on. It is an active diagnostic session. You need to turn off the sound system, roll down the windows slightly to hear external noises, and pay intense attention to how the vehicle physically communicates with you through the steering wheel, the pedals, and the seat of your pants.
-
Perform the “Bounce Test” on All Four Corners: Before you even put the key in the ignition, walk around the parked vehicle and perform the bounce test. Place your hands on a sturdy part of the fender or bumper at one corner of the car and push down with as much of your body weight as you can, then immediately let go. The car should spring back up, settle down slightly, and stop. If it continues to bounce up and down like a boat on water for two, three, or four cycles, the shock absorbers or struts at that corner are completely blown. Driving a car with blown shocks is incredibly dangerous, as the tires will lose contact with the road over bumps, significantly increasing stopping distances. If the car fails the bounce test, you must budget immediately for a major suspension repair before the vehicle can be considered safe for daily driving.
-
Let Go of the Wheel on a Flat, Empty Road: Find a relatively flat, straight, and uncrowded stretch of road during your test drive. While traveling at a steady speed (around 40 mph), loosen your grip and momentarily let your hands hover just above the steering wheel. Does the vehicle track straight and true, or does it aggressively dive to the left or the right? While a very slight drift to the right is normal due to the crown of most roads (designed for water drainage), a hard, immediate pull indicates serious steering geometry issues. This means the vehicle desperately needs a car alignment, or worse, it could be a symptom of bent control arms, degraded tie rods, or a twisted frame from a previous, undisclosed accident.
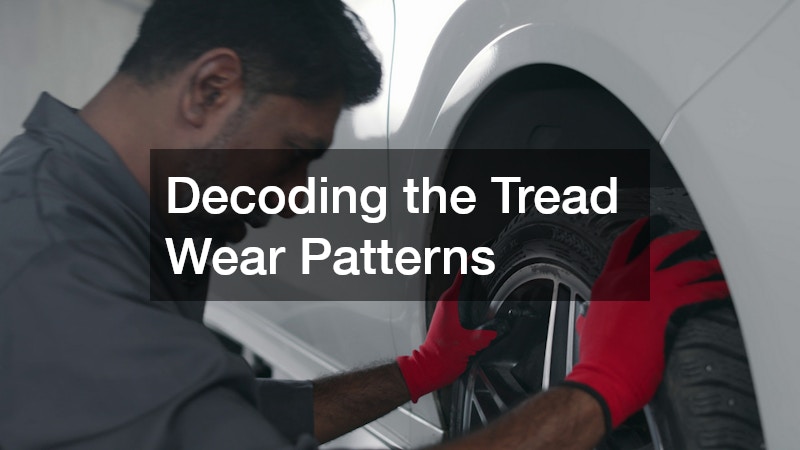
Decoding the Tread Wear Patterns
Tires are the single most important safety feature on any vehicle. They are the only four points of contact between a two-ton machine and the asphalt. But beyond their primary function, tires serve as excellent diagnostic indicators. The way the rubber wears down tells a detailed story about how the car has been driven, how well it has been maintained, and what mechanical issues might be lurking underneath the chassis.
-
Use the Penny Test Across the Entire Tread Block: Don’t just look at the outside edge of the tire. Turn the steering wheel all the way to one side so you can clearly see the entire width of the front tires. Insert a penny into the tread grooves with Lincoln’s head pointing down. If you can see the top of Lincoln’s head, the tread is too low, and the tire is legally bald. Crucially, check the inside, middle, and outside of the tread. If the center is worn bald but the edges are fine, the previous owner drove with overinflated tires. If both edges are worn but the center is thick, they drove with underinflated tires. If the inside edge is completely chewed away while the outside looks brand new, there is a severe camber issue in the steering geometry.
-
Check the DOT Date Code for Dry Rot: Tread depth is only half the story; the age of the rubber is equally critical. Rubber compounds degrade, harden, and become brittle over time due to UV exposure and ozone, leading to a condition called dry rot. Look at the sidewall for a four-digit code following the letters “DOT.” The first two digits represent the week, and the last two represent the year it was manufactured (e.g., “3518” means the 35th week of 2018). Most manufacturers recommend replacing tires every six years, regardless of how much tread is left. If you are looking at a car with eight-year-old rubber covered in tiny spiderweb cracks on the sidewall, you must plan for an immediate, unavoidable trip to a local tire shop before driving the car at highway speeds, as aged tires are highly prone to sudden blowouts.

Feeling for Stopping Power and Rotor Health
The engine makes the car go, but the brakes are what keep you alive. When evaluating a heavily used car, you must put the braking system through a rigorous, multi-stage test to ensure both safety and financial prudence. Brake components are wear items, but neglecting them can cause extensive damage to surrounding systems.
-
Listen for Squealing or Grinding at Low Speeds: Find a quiet street, roll down the windows, and apply the brakes gently while moving at low speeds. Do you hear a high-pitched, metallic squeal? This is often the sound of the acoustic wear indicators—small metal tabs designed to scrape against the metal disc when the friction material on the brake pads is dangerously thin. While pad replacement is standard maintenance, if you hear a harsh, deep grinding or crunching noise, you are in much worse territory. This sound indicates that the brake pad material is entirely gone, and the metal backing plate is gouging deep trenches into the metal rotor. This kind of severe neglect heavily increases the complexity and cost of an auto brake repair, as the calipers themselves may also be damaged from over-extension.
-
Feel for Steering Wheel Vibrations During Hard Stops: On a safe stretch of road, accelerate to about 45 mph and firmly apply the brakes to simulate a sudden, necessary stop. Pay close attention to the steering wheel and the brake pedal. If the steering wheel violently shakes in your hands, or if the brake pedal rapidly pulsates up and down against your foot, you are dealing with warped brake rotors. Rotors warp when they are subjected to extreme heat cycling—often caused by aggressive driving, towing heavy loads without trailer brakes, or dragging brake calipers. Warped rotors reduce stopping efficiency and must be replaced, which adds a significant chunk of money to your initial post-purchase maintenance budget.
Securing a Professional Under-the-Hood Diagnosis
No matter how thorough your visual and physical inspection is, there are limits to what you can diagnose in a driveway or a parking lot. The internal combustion engine and the complex electronics that manage it hide their secrets incredibly well. A car can run smoothly for a 15-minute test drive while harboring catastrophic internal engine failures that will manifest the following week. This is where professional intervention is non-negotiable.
-
Pull the Dipstick and Check for “Milkshake” Oil: Before the engine gets too hot, open the hood, pull the engine oil dipstick, and unscrew the oil filler cap. You are looking for a very specific and terrifying consistency. If the oil looks like a thick, frothy, milky-brown substance—often resembling a chocolate milkshake—stop the inspection immediately. This “milkshake” effect happens when engine coolant breaches internal seals and mixes with the engine oil. It is the absolute, surefire sign of a blown head gasket, a cracked engine block, or a cracked cylinder head. Repairing this requires a complete engine teardown, which will cost thousands of dollars. Do not buy a car with milky oil under any circumstances.
-
Request a Pre-Purchase Inspection (PPI): If the car passes all your personal checks and you are serious about buying it, you must insist on a Pre-Purchase Inspection. Tell the seller that the sale is contingent upon a clean bill of health from an independent, certified professional. You will pay to take the car to a reputable auto mechanic who will put the vehicle on a hydraulic lift to inspect the undercarriage for hidden rust, exhaust leaks, and failing mounts. They will also plug an advanced OBD-II scanner into the car’s computer to read the historical data, ensuring the seller hasn’t simply cleared the “Check Engine” light to hide persistent misfires or failing catalytic converters right before you arrived.
Factoring in Retrieval and Immediate Transport
When hunting for extreme bargains in the heavily used or “project car” market, you will frequently encounter vehicles that are not currently road-legal or roadworthy. They may have expired registration, lack valid insurance, or possess severe mechanical defects that make driving them highly dangerous. It is vital to separate the purchase of the vehicle from the logistics of moving it.
-
Map Out Logistics for Non-Running or Unregistered Deals: Never let the excitement of scoring a great deal pressure you into making an unsafe decision. Driving an unregistered, uninsured vehicle with failing brakes or bald tires home on the highway is a massive liability. If you cause an accident, you are personally and financially responsible. If the vehicle is not legally allowed on the road or if your inspection revealed major safety hazards (like the blown shocks or grinding brakes mentioned earlier), you must factor the cost of flatbed auto towing into your total purchase budget. Paying a professional transport service to carefully load the vehicle and deliver it directly to your driveway or your chosen repair shop is the only responsible way to get your new, heavy-duty project home legally and safely.
Conclusion
Navigating the heavily used car market is not for the faint of heart, but it doesn’t have to be a blind gamble. Patience, diligence, and a willingness to get your hands a little dirty are a buyer’s best tools. By systematically checking the structural integrity, analyzing the wear items, and demanding professional verification, you shift the odds in your favor, separating the hidden gems that just need a little TLC from the catastrophic money pits.
Always remember that the initial purchase price is only one part of the equation. Never let the excitement of a low sticker price override the harsh reality of impending maintenance costs. A “good deal” is only truly good if the vehicle is inherently safe and the required fixes fit comfortably within your total budget.


