
The allure of a project car is universally understood by automotive enthusiasts. It represents the ultimate mechanical canvas—a forgotten, rusting, or neglected chassis waiting to be transformed into a reliable, high-performance machine. The journey from dragging a non-running shell into your garage to finally turning the key and hearing the engine roar to life is fraught with challenges, bruised knuckles, and moments of intense frustration. Yet, the intrinsic reward of building a vehicle with your own hands makes every obstacle worthwhile. This comprehensive guide is designed to walk you through the fundamental phases of a project build. From the initial stages of finding the right base to the final meticulous steps of perfecting the clear coat, we will cover the strategies, techniques, and mindsets required to succeed. Building a car is not a weekend endeavor; it requires patience, stringent budget management, and a willingness to engage in continuous learning. Whether you are restoring a classic muscle car, reviving a nineties import, or building a dedicated track toy, the principles outlined here will serve as your roadmap.
Valuing and Sourcing Your Project Foundation
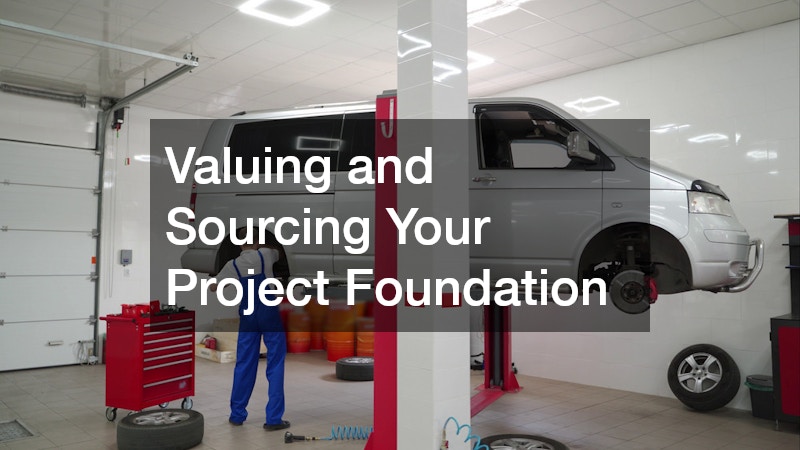
The most critical decision in any build happens before a single wrench is turned: selecting the right foundation. It is incredibly easy to be blinded by the excitement of a low purchase price or a rare model, only to discover later that the vehicle is fundamentally flawed. A thorough inspection is paramount to ensure you are not sinking your hard-earned money into a frame that is too far gone to safely restore.
When evaluating a potential project car, you must look past the faded paint and torn upholstery to assess the structural integrity of the chassis. Hidden structural damage and pervasive rust are the death knells for many projects.
-
Examine the Undercarriage: Elevate the car safely and inspect the frame rails. Look for bubbling paint, flaking metal, or soft spots. Use a screwdriver to gently probe suspicious areas; if the tool pushes through the metal, the structural integrity is severely compromised.
-
Inspect Shock Towers and Suspension Mounting Points: These areas bear immense stress. Any rot or cracking here is a massive safety hazard and requires highly skilled fabrication to repair.
-
Check the Floorpans and Trunk Pan: Pull up the carpets if the seller allows it. Water ingress from failing weather seals often pools in the footwells and trunk, rotting the pans from the inside out. While floorpans can be replaced, extensive rot is indicative of how the car was stored and maintained.
Distinguishing between manageable surface rust and catastrophic structural rot is a skill that takes time to develop. If you are uncertain about the condition of a vehicle, particularly a rare or classic model, investing in a professional auto appraisal before finalizing the purchase is a wise decision. A professional eye can spot misaligned panels, hidden accident damage, and pervasive corrosion that might otherwise go unnoticed, saving you from a financial nightmare.
Once you have determined the chassis is solid, you must calculate the true restoration costs versus the market value of the finished vehicle. Project cars almost always cost more than anticipated. Create a comprehensive spreadsheet that goes far beyond the big-ticket items like engines and paint.
-
The “Hidden” Costs: Factor in the price of new fluids (oil, coolant, transmission, brake), a complete set of polyurethane bushings, engine and transmission mounts, all new gaskets, and specialized hardware. These small items easily add up to thousands of dollars.
-
Specialty Tools and Equipment: Will you need to buy an engine hoist, a welder, or specific diagnostic scanners? Add these to the budget.
-
The Buffer: Always build a realistic budget buffer of 20 to 30 percent above your initial estimate. Unforeseen problems will arise—a snapped bolt in the engine block, a cracked dashboard that needs replacing, or a wiring harness that is beyond saving. Planning for these inevitabilities ensures your project doesn’t stall indefinitely due to lack of funds.
Scavenging for Cost-Effective Components
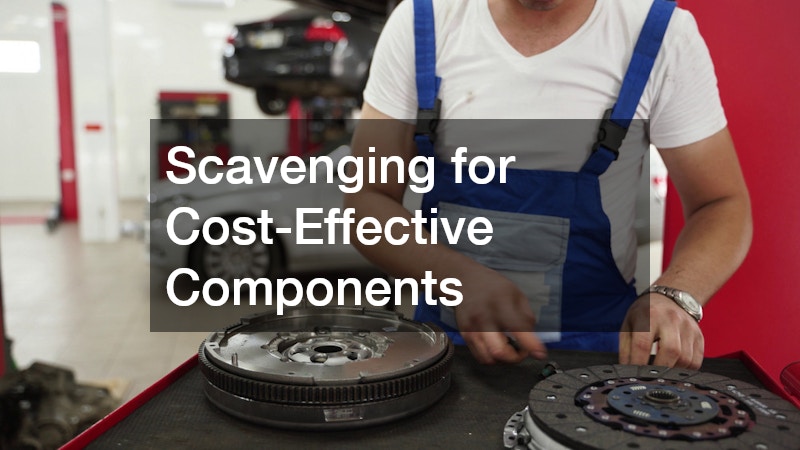
Restoring and upgrading a car entirely with brand-new, dealership-sourced components is a surefire way to bankrupt a project. Resourceful builders know that the secret to keeping costs manageable lies in mastering the art of scavenging. Building a network of reliable scrapyards, pick-and-pull lots, and online dismantling networks is essential.
You should proactively seek out local yards and understand their inventory turnover rates. Many modern salvage yards have digitized their inventory systems.
-
Set Up Inventory Alerts: Sign up for email or text notifications for the specific make, model, and year of your project car. When a fresh vehicle arrives on the lot, you want to be the first one there with your toolbox.
-
Target Rare Trim and Glass: The aftermarket rarely reproduces interior plastics, specialized trim pieces, or specific glass panels for older or niche vehicles. Utilizing auto salvaging services that specialize in dismantling and cataloging specific makes can yield these out-of-production treasures, saving you from having to fabricate replacements from scratch.
-
Establish Relationships: Get to know the operators at your local yards. Sometimes, a good relationship can grant you access to vehicles before they are placed in the general picking area.
Beyond simply pulling parts from identical cars, savvy builders excel at identifying cross-compatible components across different model years and even different manufacturers. Automakers frequently share parts bins across their entire lineup to reduce manufacturing costs. This means that high-performance brakes, robust suspension components, or larger throttle bodies might be hidden in plain sight on a base-model commuter car or an entirely different vehicle built on the same platform.
-
Master Part Number Cross-Referencing: Use online forums, manufacturer parts catalogs, and cross-reference databases to find interchangeable parts. For example, a larger mass airflow sensor from a V8 truck might bolt directly onto a V6 sports car from the same manufacturer.
-
Upgrade Through OEM Parts: Often, the easiest way to upgrade your project is by finding the “heavy-duty” version of a part from a luxury or towing-package variant of your vehicle’s platform.
-
Inspection is Crucial: Whenever you source used auto parts from a donor vehicle, meticulous inspection and cleaning are mandatory. Never install a salvaged component blindly. Rebuild salvaged brake calipers with new seals, flush out salvaged radiators, and test electronic modules with a multimeter. Failing to refurbish scavenged parts introduces entirely new points of failure into your build, causing massive headaches during the troubleshooting phase.
Sorting Out Powertrain and Electrical Gremlins

There is perhaps nothing more intimidating to a novice builder than a tangled web of modified, degraded, or malfunctioning wiring. Electrical gremlins can keep a mechanically sound car from ever leaving the driveway. Approaching the electrical system requires methodology, patience, and the right diagnostic equipment.
One of the most common issues in older project cars is a parasitic battery drain—a situation where an electrical component continues to draw power even when the ignition is switched off, leaving you with a dead battery every morning. Tracing this requires a systematic approach.
-
The Multimeter Method: Disconnect the negative battery cable and connect a digital multimeter in series between the cable and the battery post, set to read amperage. A reading above 50 milliamps generally indicates a problematic draw.
-
Isolating the Circuit: With the multimeter connected, begin pulling fuses from the fuse box one by one. Watch the multimeter display. When the amperage drops significantly after a specific fuse is pulled, you have identified the circuit causing the drain.
-
Executing Proper Fixes: Once the faulty component or chafed wire is found, the repair must be permanent. Proper car wiring repair means entirely avoiding cheap, temporary crimp connectors or twist-and-tape methods. You must strip the wire, physically intertwine the copper strands, apply rosin-core solder for a permanent conductive bond, and seal the connection with marine-grade, adhesive-lined heat shrink tubing to prevent future corrosion.
Modern vehicles, particularly imports, introduce another layer of complexity with their reliance on computer modules and multiplex networks. A standard generic code reader from a local auto parts store will only scratch the surface, often only providing generic emissions-related fault codes.
-
Invest in Manufacturer-Specific Software: To truly diagnose issues with ABS modules, body control modules, or complex transmission controllers, you need the right software. Tools like VCDS for Volkswagen and Audi platforms, or INPA for BMWs, allow you to read manufacturer-specific codes, perform actuations, and code new modules to the vehicle’s network.
-
Acquire the Right Hardware: DIYers tackling european auto repair in their home garage must also invest in specific toolsets. Attempting to disassemble a German engine with standard SAE wrenches will quickly lead to stripped bolts and disaster. A comprehensive set of metric tools, inverted Torx sockets, triple-square bits, and specialized locking pins for timing jobs are absolute necessities.
Finally, as you upgrade your project car with modern accessories like high-draw dual electric radiator fans, high-output fuel pumps, or modern infotainment systems, the factory wiring harness will likely be inadequate. Drawing excessive current through forty-year-old, thin-gauge wire is a massive fire hazard. You must upgrade the harness by routing new, appropriately thick-gauge wire directly from the battery (or a dedicated power distribution block), utilizing inline fuses, and wiring in heavy-duty relays so the factory switches only see a low-amperage trigger signal rather than the full load of the new accessory.
Upgrading Safety and Heavy-Duty Systems
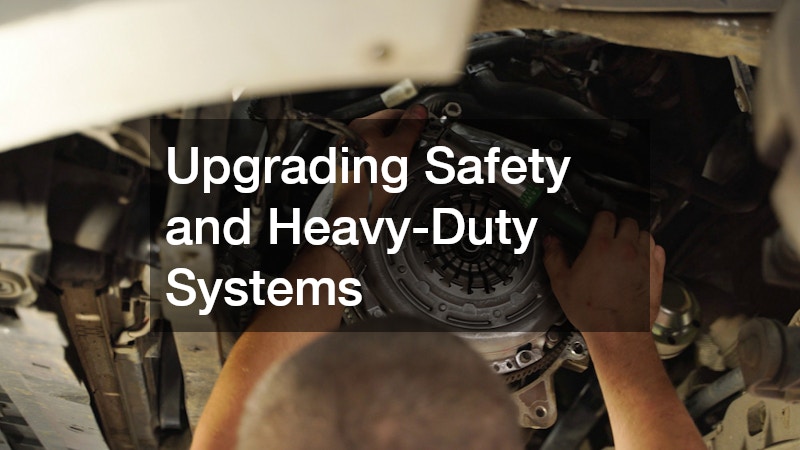
It is incredibly tempting to pour all your time and budget into increasing horsepower. However, propelling a vehicle to high speeds is entirely pointless—and highly dangerous—if the chassis cannot safely handle the power, bring the vehicle to a controlled stop, or manage the increased thermal loads. Upgrading safety and heavy-duty systems must take precedence over pure performance modifications.
Vintage project cars frequently come equipped with outdated four-wheel drum brake systems. While adequate for the speeds of their era, they suffer from severe brake fade under heavy use and provide inconsistent stopping power. Converting a front drum setup to a modern, slotted or vented disc brake system is a mandatory upgrade for a drivable project.
-
The Conversion Process: A proper disc brake conversion is not just about bolting on calipers and rotors. It requires swapping out the original master cylinder for one with a larger bore designed to push the increased fluid volume required by disc calipers.
-
Managing Brake Bias: You must also install an adjustable proportioning valve. Disc brakes require different hydraulic line pressures than drum brakes; without the correct proportioning valve, the rear wheels may lock up prematurely during hard braking, causing a dangerous loss of control.
-
Handling the Hard Lines: Rerouting the hydraulic system often involves cutting, bending, and flaring new stainless steel brake lines. If you lack the specialized hydraulic flaring tools or the confidence to create perfectly sealed, leak-proof double flares, do not take the risk. Outsourcing the custom fabrication of your hard lines to local auto brake services ensures the most critical safety system on your vehicle is handled with professional precision.
Beyond stopping power, a project car subjected to spirited driving or track days will quickly overwhelm its factory cooling and suspension components. Upgrading to commercial-grade or heavy-duty solutions provides a massive increase in reliability.
-
Thermal Management: Factory radiators are often constructed with single-core aluminum and plastic end tanks that become brittle over time. Upgrading to a fully welded, multi-core aluminum radiator significantly increases fluid capacity and cooling efficiency. Furthermore, if you are running an automatic transmission, bypassing the factory cooler integrated into the radiator and installing a standalone, heavy-duty stacked-plate transmission cooler is vital to prevent fluid breakdown under heavy loads.
-
Suspension Fortification: Decades-old rubber suspension components will be cracked, compressed, and useless, leading to sloppy handling and unpredictable alignment changes under cornering loads. Upgrading to components designed for severe duty is the solution. Consider sourcing high-durometer polyurethane bushings, reinforced control arms, or upgraded leaf springs that are frequently utilized by commercial fleet services. These robust components are engineered to handle immense weight and continuous abuse, drastically reducing body roll, preventing wheel hop under acceleration, and providing a tight, responsive feel to the chassis.
Restoring the Shell and Eradicating Rust
With the mechanical systems sorted, the focus shifts to the physical body of the vehicle. Restoring the shell is often the most time-consuming and labor-intensive phase of the entire build. Rust is automotive cancer; if it is not completely eradicated, it will continue to spread beneath fresh paint, ruining hundreds of hours of work.
Floorpans, rocker panels, and lower quarter panels are the most common victims of severe rot. Patching these areas requires patience and basic metalworking skills.
-
Excision is the Only Cure: You cannot simply sand over deep rot or fill it with fiberglass body filler. You must use an angle grinder with a cutting wheel to cut completely past the rust line, exposing clean, bright metal on all sides of the hole.
-
Fabricating and Welding Patches: Once the rot is removed, use cardboard to create a template, and transfer that shape to fresh 18-gauge or 20-gauge sheet metal. Coat the overlapping edges of the chassis and the patch panel with a high-quality zinc weld-through primer to prevent future oxidation between the layers.
-
Managing Heat: When MIG welding the patch panel into place, avoid running continuous beads, which will introduce massive heat and warp the surrounding sheet metal. Instead, use a series of small tack welds, jumping to different sides of the panel to distribute the heat evenly until the patch is completely stitched in.
-
Knowing When to Ask for Help: While DIY structural welding is highly rewarding, exterior body panels require a delicate touch to avoid warping. Seeking advice or guidance from professionals at auto body shops regarding the complex arts of hammer-and-dolly work, managing panel gaps, and applying skim coats of filler can elevate the final result of your exterior restoration from a wavy, amateur job to a smooth, show-quality finish.
Beyond rust, the physical alignment of the chassis is critical. A vehicle that has been in an undocumented accident or subjected to decades of hard use may have a tweaked or twisted structure. Before you mount any of your newly upgraded suspension components, you must ensure the shell is perfectly square.
-
Checking the Measurements: This involves setting the car on perfectly level jack stands and dropping plumb bobs from specific factory measurement points located on the subframes and core supports. By measuring the diagonals in an “X” pattern beneath the car, you can determine if the chassis is skewed. If the measurements from front-left to rear-right differ from front-right to rear-left, the unibody is bent.
-
The Limits of the Home Garage: While you can easily replace a bolt-on subframe, a twisted unibody structure is generally beyond the capabilities of a home DIYer. Explain exactly when a bent structure requires intervention: if the main unibody rails are compromised or skewed, the vehicle must be taken to a facility equipped with hydraulic pulling towers. The laser-measuring systems and heavy-duty frame racks found only at an auto collision shop are mandatory to pull the high-strength steel back to factory geometric tolerances safely.
Finalizing the Aesthetic and Shielding the Paint
The culmination of your project car build is the final aesthetic finish. After the primer has been block-sanded to perfection and the base coat and clear coat have been sprayed and allowed to cure, the paint will likely not look perfect straight out of the spray gun. Even in professional paint booths, minor imperfections, dust nibs, and a slight texture known as “orange peel” are common. Achieving a flawless, mirror-like finish requires a meticulous multi-step correction process.
-
Wet Sanding: The first step is to level the clear coat. Using a semi-rigid backing pad, carefully wet sand the entire vehicle with 1500-grit, followed by 2000-grit, and finishing with 3000-grit automotive sandpaper. Keep the surface thoroughly lubricated with a mixture of water and a few drops of dish soap. The goal is to completely flatten the orange peel texture until the clear coat has a uniform, dull, frosted appearance, taking extreme care not to sand entirely through the clear coat layer, particularly on the edges and body lines.
-
The Two-Stage Cut and Polish: Once the surface is flat, you must restore the gloss. Begin with a rotary or dual-action polisher equipped with a heavy-cut wool or foam pad and a heavy cutting compound. This step removes the 3000-grit sanding scratches but may leave behind minor micro-marring or holograms. Follow this with a second stage, using a soft finishing foam pad and a fine polish. This refines the finish, removes any remaining haze, and brings out an incredibly deep, optically clear, mirror-like shine.
After investing thousands of dollars and countless hours into perfecting the exterior shell, leaving that pristine clear coat exposed to the harsh realities of the road is a massive risk. The first time you drive your restored project car, a single stone thrown up by a passing truck can instantly chip your perfect finish down to the primer. Protecting this investment is essential.
-
Targeting High-Impact Zones: You must seal the most vulnerable areas of the vehicle. The front bumper, the leading edge of the hood, the front fenders, the side mirrors, and the rocker panels just behind the wheels are the highest-risk zones for road debris, bug splatter, and rock chips.
-
Application Techniques: Shielding these areas involves applying a specialized, optically clear, self-healing polyurethane barrier. The application requires creating a slip solution (usually baby shampoo and distilled water), laying the material over the panel, and carefully squeegeeing out all the air bubbles and moisture from the center outward.
-
Navigating Complex Curves: Stretching this protective material around complex curves, like the deep recesses of a modern front bumper or the sharp character lines of a hood, requires the precise application of heat from a heat gun to soften the polyurethane and manipulate it into place without tearing or creating stretch marks. Highlighting the incredible long-term return on investment, applying high-quality paint protection film over the freshly cured clear coat ensures that the pristine finish you worked so hard to achieve remains flawless for years to come, preserving the immense physical and financial effort poured into the restoration.
Building a project car is an arduous, complex, and deeply challenging undertaking. The first time you finally drop the car off the jack stands, slip behind the wheel, turn the key, and drive a machine that you practically brought back from the dead with your own two hands, you will experience an unmatched level of satisfaction. However, it is vital to remember that a custom-built vehicle is a living, breathing mechanical entity. The maintenance is never truly over. The first few hundred miles will be a shakedown period requiring constant vigilance—listening for unusual noises, retightening suspension bolts, checking for fluid leaks, and fine-tuning engine parameters. Embrace this ongoing process as part of the builder’s lifestyle. Document every phase of your build with photos and notes, share your inevitable setbacks and hard-won triumphs with local enthusiast communities, and most importantly, get out there and safely enjoy the incredible road ahead.
